
Hello Littlest Sweet Shoppers
I am so shocked because I couldn't find photos I took from when I first started building the dolls house except for these ones. I did take pictures throughout every step but since it started around summer of 2017, I realised that it will take a long time to finish so no point uploading the photos yet. However when I searched in all of my photo albums in 2017, I couldn't find a single one!
There is only 1 camera so I usually take hundreds of photos of Littlest Sweet Shop miniatures alone so I can't help thinking that I probably deleted them on the camera (due to limited space) since I assumed they were already on my laptop's hard disk. These are photos I took after I continued building it again in June this year. It's a shame since I really wanted to compare how it looked from when I first started building in 2017 but there's nothing else to be done really.
Anyway let's get to it! This is a Greenleaf kit which is made out of sheets of pre-cut plywood. It isn't cabinet grade plywood like PuppenHaus (1:6 scale dolls house from Real Good Toys) but strong enough for a smaller build. I never planned to build another dolls house after PuppenHaus but someone was selling this kit for a bargain and I had leftover paint and materials from the first dolls house so I thought, "Why not?".
Greenleaf kits come from America but way cheaper than Real Good Toys kits. I had a lot of issues building this one as it isn't as straight forward as the Real Good Toys kit so there was a lot of regret even just after a few weeks of building. There were too many problems faced and when I did some research online I found out that this was one of the toughest kits to build from Greenleaf and a LOT of people gave up half-way through.
I don't give up easily but I was very frustrated with every single aspect of the build. The instructions was all text with a few drawings. There were NO detailed pictures for reference so you can imagine how confusing it was when I had no clue whether the end of the beam would be exposed, or not (for example).
I continued on despite the lack of clear instructions and many occasions of trial and error. Too many times parts were glued and pulled apart again. You only find out once you build a few steps ahead and realised that Wall F was put in wrongly. Very frustrating and I even read that someone was so frustrated with this kit that they left it on the side of a motorway! Indeed it was tempting to lift it up and smash it into hundreds of pieces (so satisfying!) but I told myself to NEVER GIVE UP!
My husband kept saying that I shouldn't have cheapened out and get a proper (more expensive) kit since I spent probably three times more time on building Pink Tudor than I did on PuppenHaus. The pieces are actually only pre-cut so I had to physically knock-out and remove every piece carefully. There were hundreds of components and thousands of roof shingles which took days just to remove. Then it had to be sanded before it could be assembled. It takes 24 hours to wait for glue to dry for each step and there were hundreds of different steps! The workload almost drove me to madness and by September of 2017 I thought it will never be built. I stopped building by October 2017 since it started to get cold and there was a lot of sanding involved which I only did outdoors.
I manage to start making miniatures again while Pink Tudor just sat in the corner of my room. I couldn't simultaneously do woodwork and make miniatures since polymer clay attracts dust like magnet and there was a ridiculous amount fine dust when I'm building.
When I came back from holiday at the end of May 2018, I continued my quest. I kept building, sanding, gluing, cutting everyday for 3 months without making any polymer clay miniatures. I really missed playing with clay but I knew that I had to continue building otherwise it will never be built.
 |
| May 2018 after 2 coats of pink 'Rose Trellis' paint on the main building |
 |
| Without the roof installed. |
I only had experience from building the PuppenHaus 4-5 years ago which I thought would be advantageous. I remembered what a pain it was decorating after the main house was built so I made sure to glue on the wallpaper and paint the interior before it it was assembled. I used Dulux satin paint for the main building which is the same pink custom colour from PuppenHaus. Dulux satin white was used to paint all components, ceilings and inside trim. Tudor is traditionally black and white but I've decided from the start to make mine pink and brown. Beams were painted in Dulux gloss in chocolate but the outside trim of the house is actually painted in matte acrylics also in chocolate. The floors were scored before it was painted in semi-gloss wood stain.
 |
| Because there were no detailed pictures, I had to guess which bits should the wallpaper cover. I often just cut around the walls but never expecting another 'bay window' to be attached through an opening. |
The wallpaper is also from Tilda paperstock (leftover from PuppenHaus) and there were a few pages where the pattern was scaled down and perfect for 1:12 scale.
 |
| I stopped building in 2017 just after installing the beams so when I continued I totally missed the step saying that the beams should be glued on to another piece. Instead I glued the beams directly onto the ceiling. >< |
 |
| Window and door trims, sanded, painted, sanded and re-painted. Everything gets at least 2 coats. |
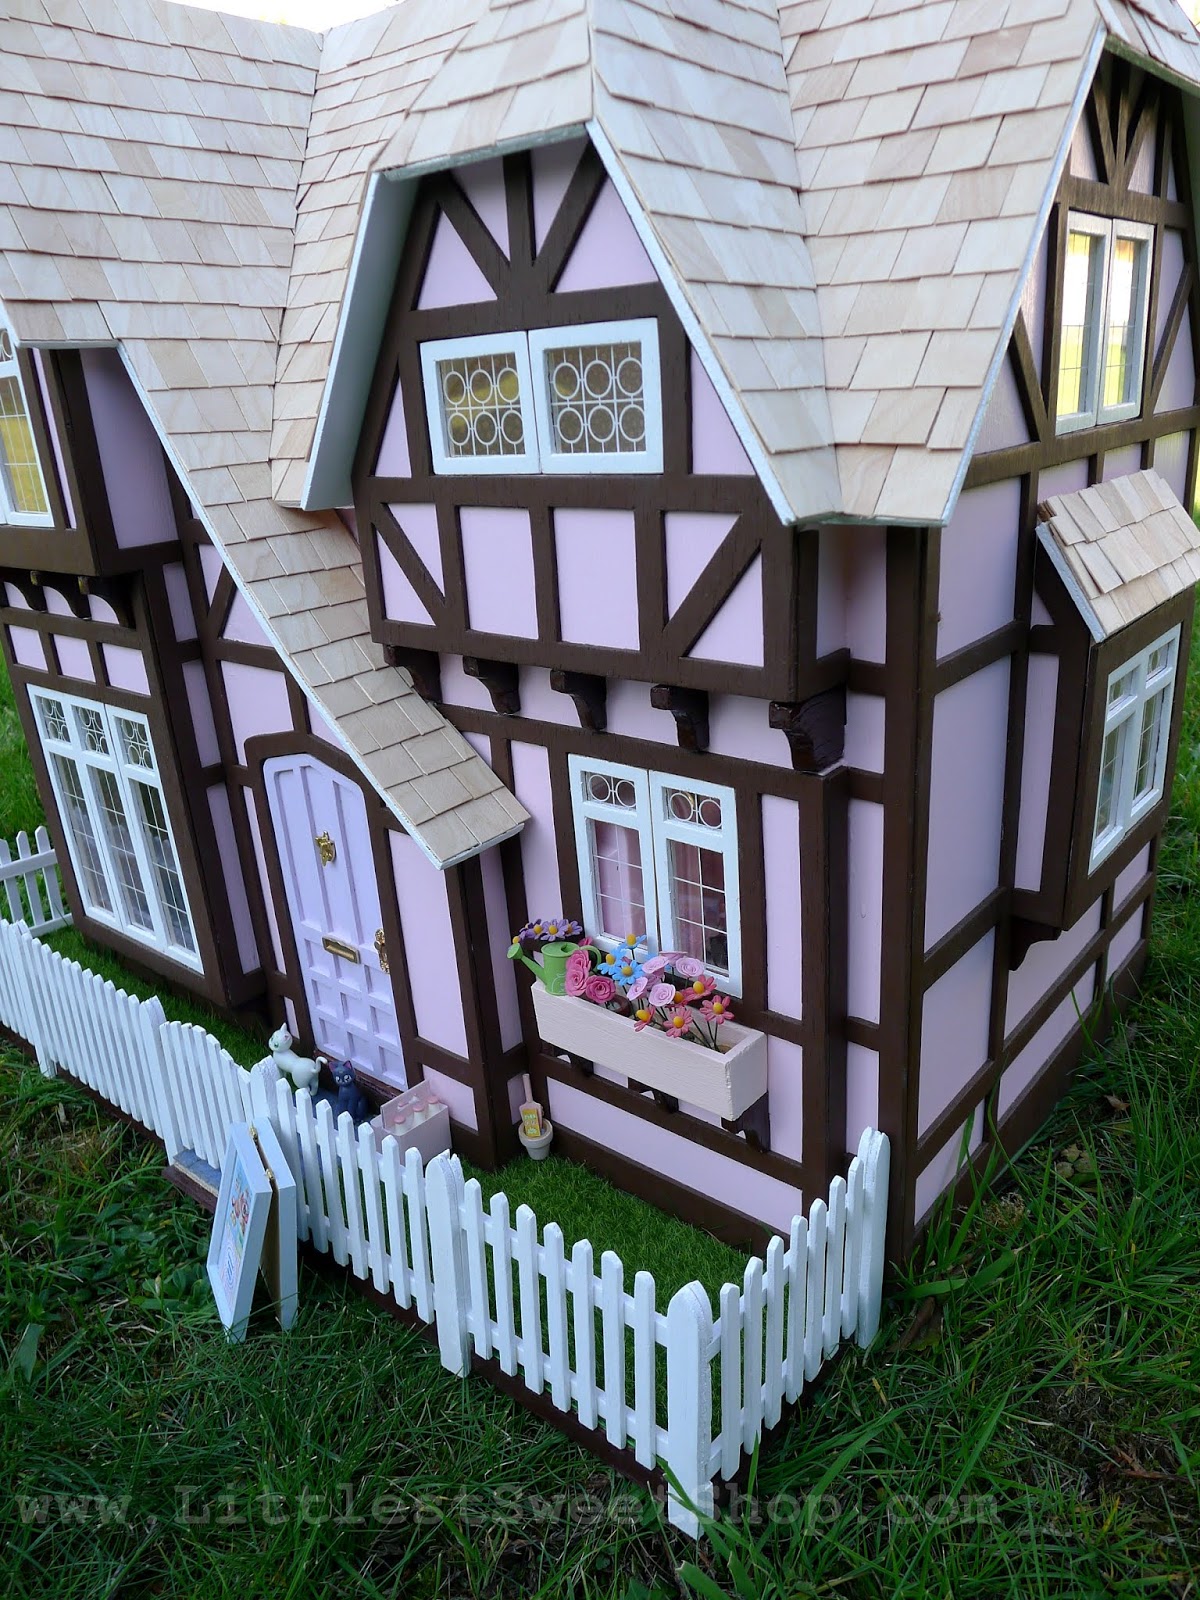
The roof was probably the most annoying thing to install as the parts didn't fit at all and I had to saw a few pieces. After that it took me almost 2 weeks to glue on thousands of shingles onto the roof. Everything on the edge had to be manually re-sized and trimmed and this was all during the very hot summer of 2018! I couldn't find the right kind of stain for the shingles here in the UK so had to leave them as it is unless I wanted to paint them.
 |
| Such a relief once roof is finally installed even though there was a lot of hacking involved. |
Since so many hours have already been spent just trying to build the kit, I invested more time in making a very realistic looking brick-effect chimney. This probably took a little over a week to make as I had to hand-cut each piece of brick in polymer clay. I mixed different shades of terracotta bricks by mixing it with grey-ish scrap clay and even gold clay to make it look more real.
 |
| Use PVA glue to paste each hand-cut brick directly onto the wood |
 |
| Fill gaps with FIMO air dry clay |
 |
| Bricks are mixed in different shades for realism |
Finally there was the optional picket fence which took probably 2 weeks to build as there were over 100 tiny picket fences to sand, paint, re-sand, paint.
 |
| Fence posts went up first. Must leave for 24 hours to let glue dry fully |
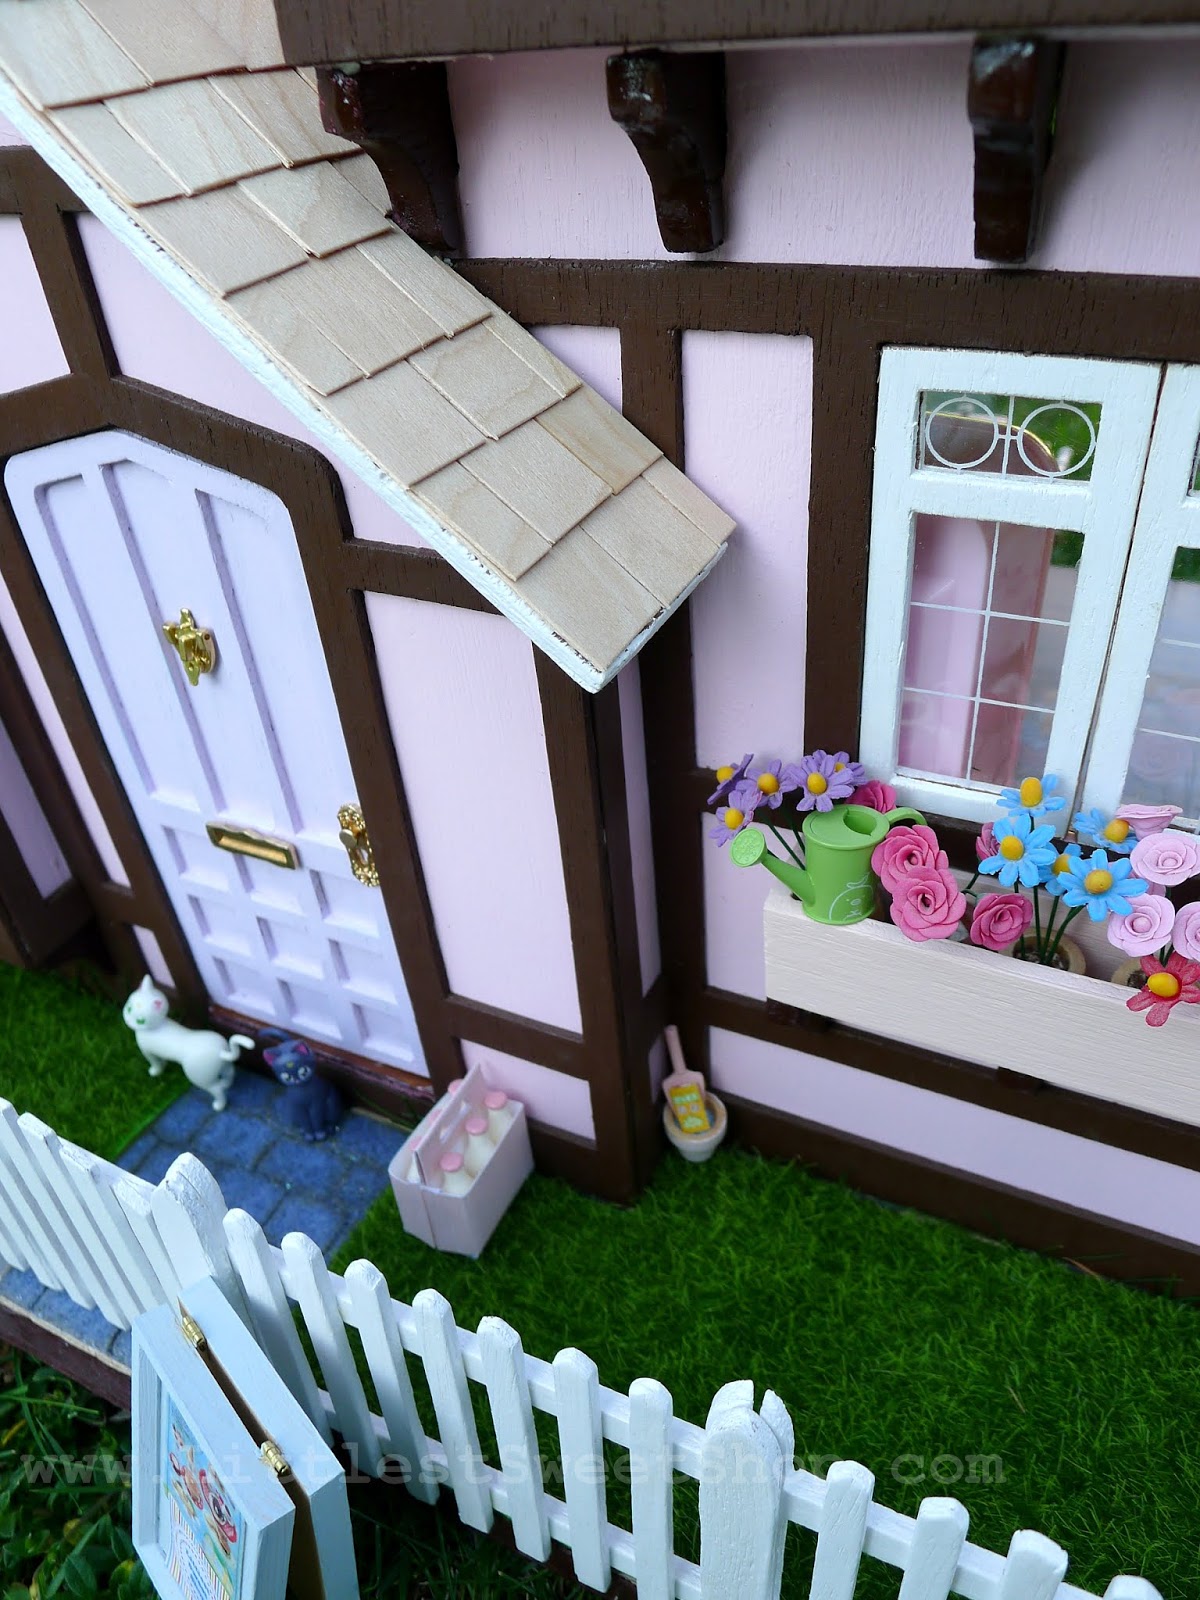
The house was completed with some door handles and components which I bought separately because none came with the kit as it is very basic. The front yard was completed with dollhouse grass and a stone pavement which is also made from clay. It was relatively easy and you can shade the stones with more soft pastels for additional shading and added realism.
Finally after a year I had a new 1:12 scale Tudor style dollhouse! Currently I haven't added any furniture nor lighting. The kitchen has some bits here and there but it's mostly used to store any 1:12 miniatures that I had so that it was separate from the 1:6 miniatures. I don't plan to furnish it yet as furniture can be quite expensive and I think I spent too much time on this project already. As and when I see something I like, it will be added to Pink Tudor and I will do a blog update once that is ready. I'm not planning to add interior furnishings like curtain rails or curtains since I usually do that last after furnishing the whole house. I will probably get LED lights for it this time since wiring a dollhouse is a tedious process which I regretted doing for PuppenHaus.
 |
| Granite clay rolled out thinly and draw out stones using a needle |
 |
| Cut to the size of the pathway and shade with pastel on edges |
I'm sure I sound like I moaned a lot through the process of building this and in hindsight I probably shouldn't have gotten a cheaper kit in the first place. I was determined to finish it only because I already started it and my husband was sweet enough to buy me the kit. My advice for anyone who wants to build a dollhouse from a kit is to make sure that you are willing to put in a lot of time into doing it properly or as close as you can to perfect. PuppenHaus is around 5 years old now but still looks brand new thanks to 2 paint jobs on the main house and components. Always use a good paint and remember to always sand the wood before the paint goes on and leave it for at least 24 hours for the paint to soak thoroughly into the wood the first time. All of the effort is worth it especially when you can be proud of something you built with your own sweat and tears.
At least now I finally have a 1:12 scale dollshouse and a new ongoing project. This is the most popular miniature scale so it's something which would come in handy for me especially since I plan to make more 1:12 scale miniatures in the future. I don't see myself building another dollhouse anytime soon but I still plan to make more miniature wooden furniture one day. Next summer I will build a new diorama for Littlest Sweet Shop since the current one would have been 6 years old and urgently needs updating!
That's all for today. I'm busy with small orders which is coming in via Etsy but I hope to debut more new miniatures before Halloween. Don't forget to subscribe to us on YouTube for miniature food tutorials and follow me on Instagram to find out what I am up to via Instagram Stories.


